New Astrophotography Gadget
Over the years I've tried night sky astrophotography in several forms, never with great success. My accumulated collection of quality equipment never seemed enough to produce excellent results. I don't have a permanent observatory. It's getting physically harder to haul everything outside, set it all up, and tear it down afterward, especially in freezing conditions.
I recently discovered and purchased an easier, relatively inexpensive
alternative for astrophotography called the Seestar 50. At first glance
it doesn't look like a telescope!
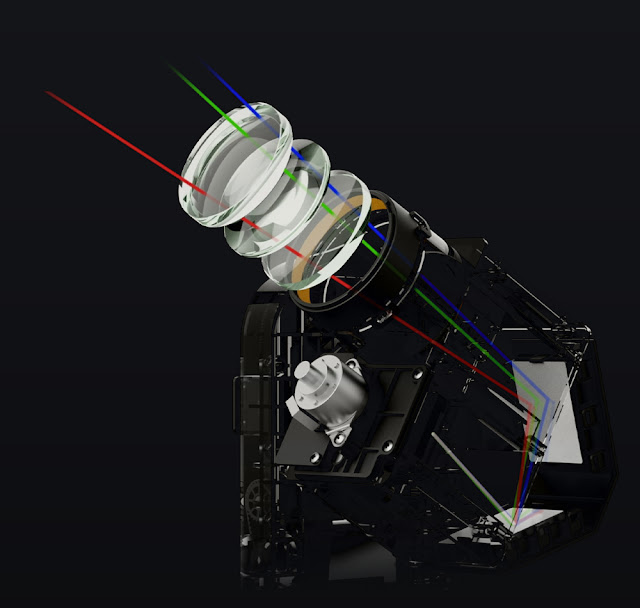
A small telescope, camera, filters, dew heater, and rechargeable battery are all contained inside this astounding device. It comes with its own tripod, and is controlled through a wifi connection to either a smart phone or tablet. The 50 mm telescope lens is visible in the next picture.An image from the manufacturer's website shows the internal design.
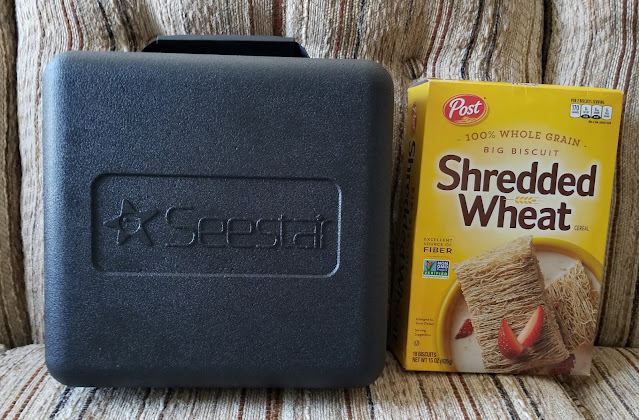
The whole thing is amazingly compact, just a bit larger than a cereal box.
It's also extremely portable because the telescope, tripod, solar filter, and USB cable fit within a small hard plastic carrying case.
When my new toy arrived I wanted to explore its capabilities immediately. Inevitably, cloudy weather was forecast for several days. On January 24th I peeked outside and noticed large gaps
between daytime clouds. I rushed outside, set the small telescope down on a garden wall,
powered it up, put on the included solar filter, established a wifi
connection to my phone, and, using my phone, commanded it to point to
the Sun. Amazingly, it pointed to the Sun!I took a couple Sun pictures
and one video. It was really easy to shut down and carry inside
when clouds increased minutes later, a welcome change from the effort and time needed
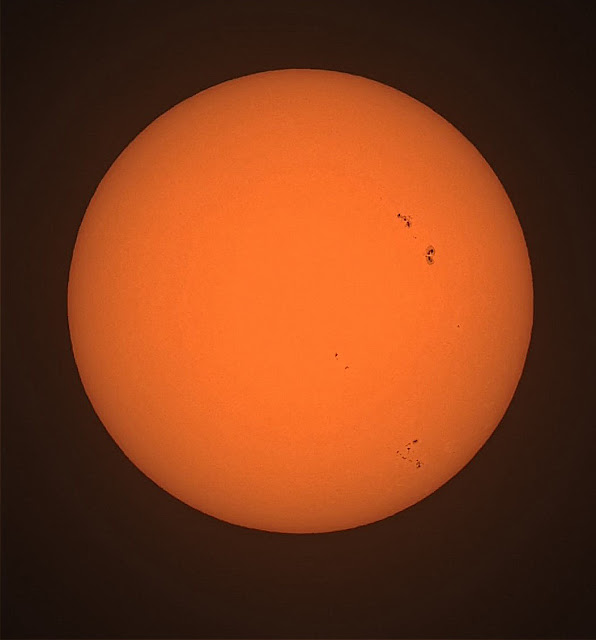
to break down and pack up my more complicated telescopic equipment. Clouds parted long enough to capture the quick Sun photo shown below (slightly sharpened using Registax wavelets). The image is good enough to show the whole Sun with
scattered sunspots. It isn't a high resolution
image capable of being magnified like images I get from my dedicated
solar telescope, but it's good enough to show some detail in larger sunspots.
Seestar can photograph surrounding landscape when put in scenery mode. It then acts like a camera with a telephoto lens. In scenery mode it doesn't track sky movement caused by Earth's rotation. After imaging the Sun I tested this capability by pointing at a distant neighbor's rooftop vent and got this clear detailed image.
After
this brief initial session I wanted to inspect the pictures and move
them to my laptop. I could see the pictures on my phone, but I'm
not fond of tiny screens and lack of visible detail in small images. I
assumed images would be stored in the telescope's onboard memory.
(It has about 60 GB of internal memory.) Unfortunately, the image files
there were empty. I learned the onboard memory only stores videos and stacked images, not individual JPEG snapshots. The snapshots were on my phone. I could view them on my
phone, but they were somehow imprisoned within the telescope control app
itself. I spent hours trying to figure out how to get them out of the
app and into the phone's regular picture gallery where all my photos are normally stored. Online help wasn't useful. Eventually, I found a
15-step procedure to accomplish getting the images to my laptop. The
phone app is designed to easily post telescope images directly to the
telescope company's instagram-like online sharing app. So I had to first
sign into an account (yet another password to create and remember).
Then I posted an image to the sharing site. Then I copied the URL for my
post from the phone into my laptop browser. Then I was able to save the
image onto my laptop from within the post displayed there. At this
point I was pretty discouraged. If I had to do this for every image, it
would be ridiculous!
I also installed the telescope control app on my tablet as well as my
phone. The tablet has a more recent Android version than my phone, so
there was hope tablet image files would be easier to access.
Clouds persisted into the evening of January 26th. Just
before going to bed I peeked outside and noticed significant gaps between clouds. I rushed
outside with the little scope. This time I used my tablet to control Seestar instead of my phone. The larger tablet screen was nice. It
was a pleasant warm 60 degree night. I sat comfortably
next to the scope and pointed it toward the full Moon. In no time I had
a couple nice snap shots of the Moon and one video. Conditions were about as poor as
possible for any other imaging. The full Moon was reflected from many scattered clouds and neighbor's spotlights were shining
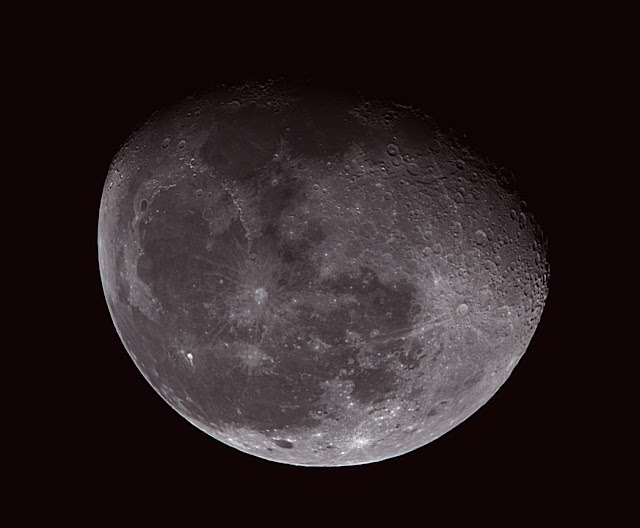
directly into my backyard. This picture of the nearly full Moon was made by stacking 16 frames from a 161 frame AVI video.
Afterward I discovered images stored on my tablet were easy to access and transfer to a laptop, so I won't be using my phone to control Seestar.
Three days later, on January 29th, the evening sky finally cleared and the bright Moon did not rise until about 9:30. This was my first opportunity to use Seestar for long exposures of deep sky objects. In deep sky mode Seestar builds images by taking many consecutive ten-second exposures and automatically stacking (adding) them up to produce an equivalent single long exposure. My first target was the famous Horsehead Nebula in Orion. This dim nebula requires long exposure times. After a couple false starts I began to accumulate results. The image stack appeared to be building up as expected, but then it stopped getting brighter. Soon the telescope stopped imaging and told me the Horsehead's altitude had become too high for accurate tracking. I think images were being rejected from the stacking process because of tracking errors. So I switched to a much easier target, the famous Orion Nebula which has been imaged endless times by astrophotographers. I centered the nebula, commanded the internal light pollution filter to be inserted in the light path, and started accumulating 10-second exposures. During the subsequent half hour imaging time I went inside my house and monitored progress in comfortable interior warmth while the telescope continued working in the cold outside. The wifi connection was strong enough to allow telescope control from a distance! I could even watch TV while monitoring the image on my tablet! Thirty minutes later I had captured the image shown next.

Wow! The image above is better than any of my laborious previous attempts with other equipment!
Next I tried an object in the north, the galaxy pair M81/M82 in Ursa Major. Without going outside, I used my tablet to command the telescope to point to M81. It was extremely satisfying to see the preview image appear nearly centered on the tablet screen! Unfortunately, the galaxy pair was arrayed across the narrow side of Seestar's rectangular field of view, so both galaxies are near the edges. This is one of the disadvantages of Seestar. There's no way to rotate the field of view like I can when my Nikon is attached to my large refractor. At some other time of night the galaxies might be in another more favorable orientation within the field of view. I'll have to explore the possibilities in the future. I accumulated ten-second exposures for 20 minutes and produced the following image.
I should have centered on the spiral M81 and tried a longer exposure on just M81 alone. Maybe next time.Eventually, the 88-percent illuminated gibbous Moon rose and Seestar's battery was getting low. It was time to stop long exposures. Before shutting down I pointed toward the rising Moon and took a 90-second AVI video. I then stacked 100 out of 1,000 video frames to produce the next lunar image.
Seestar has some disadvantages. The telescope has a relatively small 50 mm aperture. The altitude/azimuth mount cannot track without incorporating unavoidable image rotation during long exposures. Tracking is difficult at high altitudes near the zenith. The field of view is small. Image quality will never match what is produced by larger, more expensive equipment. On the other hand, portability and wonderful ease of use are valuable compensating advantages. On cold nights when the effort to set up complicated equipment becomes an obstacle, Seestar overcomes the motivational obstacle. Requiring only one short trip outside, it can begin capturing images within about 15 minutes of startup. And it can be controlled wirelessly from within a comfortable house! I'm very happy with the Seestar system and looking forward to using it more!


