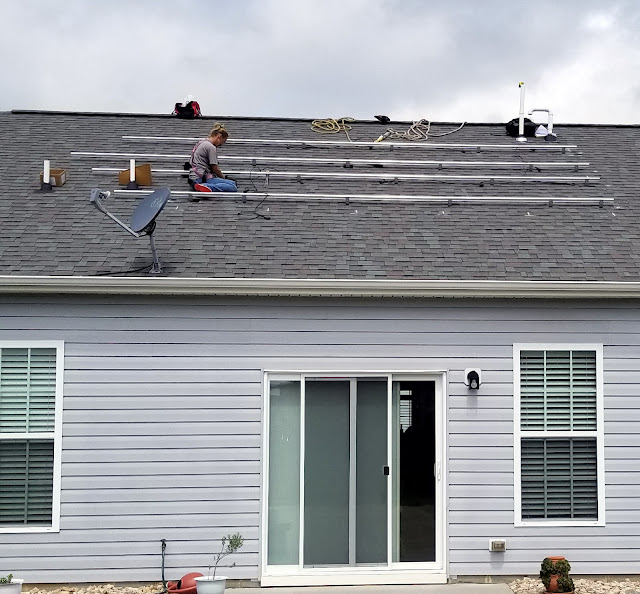
We recently became the sixth family in our neighborhood to have rooftop solar panels installed. A friendly installation crew arrived in two trucks.
They were soon at work arranging equipment around our house. Mounting rails were readied.
Solar panels were stacked against the fence.
Each panel comes with its own inverter which converts the panel's DC output to AC.
My system consists of ten panels made by Silfab Solar. Each individual panel is composed of 60 monocrystalline silicon solar cells. A single panel produces a maximum power of 320 watts. Solar radiation is converted to electric power with a maximum efficiency of 18.8 percent. Of course, the panels will not work continuously at maximum capacity because rays of undiminished sunlight seldom fall perpendicularly on the panels. Clouds, atmospheric conditions, and solar altitude will vary. Apparently, the panels respond most strongly to wavelengths of invisible infrared light which survive unabsorbed through the atmosphere. The next image shows the spectral response of monocrystalline solar cells (c-Si - the green curve) as well as the spectrum of sunlight that penetrates to Earth's surface.
The crew laid out hardware for mounting the rails to the roof.
If you enlarge the previous image (by clicking on it), you can see where mounting brackets for the rails were attached through the roof to beams below. Each bracket sits on a rubber mat which slips partially under a shingle. This arrangement prevents leaks since rainwater flows down the surface of the roof under the panels.
Eventually, the rails were ready to accept solar panels.
Here's a closer view of the rail mounting.
Now it was time for panels to be attached to the rails.
The panels were placed in approximate positions.
Panel spacing was precisely adjusted as they were attached to the mounting rails.
While panels were installed on the roof an electrician was wiring electrical connections to deliver solar power either directly into our house or out into the electric power grid.
Solar power travels from the roof, down through our attic, and out to the side of the house through this exit.
Power first goes into the controller box on the right, then into a cutoff switch in the middle, and finally through vinyl siding on the upper left into the household main service panel, or breaker box, not visible on the other side of the wall. (The electric power meter is in the lower left.)
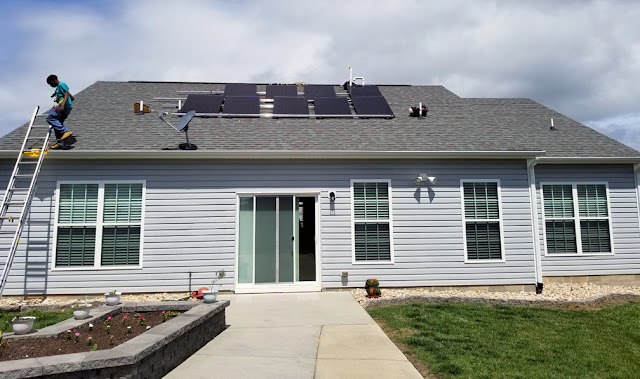
The crew finished the entire installation in about 4.5 hours. The final panel assembly looks like this.
There's definitely room on the roof to add more panels if I ever wish to do so. There is a generous gap between panels and roof which helps cool the panels. Rain doesn't fall directly on shingles under the panels. Rain water will flow down the roof under the panels. Leaks are prevented by rubber mats previously mentioned.
It took several weeks to obtain all necessary permits to allow installation to proceed. Unfortunately, there will be more waiting for final inspections by county officials. Will that be the end? No. Dominion Power must then install a new electric meter. At that point, finally, the system will be turned on and deliver solar power. I'm extremely curious to see how well it works! This is definitely a case of delayed gratification!


No comments:
Post a Comment